YouTube channel art is an important element in your branding and is potentially one of the first things that visitors to your channel are going to notice, so you need to get it right.
If you’re looking to create a high-quality channel banner, the easiest and quickest way to do that is to use an online design tool such as Snappa (or one of the many Snappa alternatives).
If you haven’t come across the tool before, it’s online graphic design software that allows you to create a whole range of designs either by utilizing one of their predesigned templates or by creating a design from a blank canvas.
Snappa has a good range of templates for YouTubers, including thumbnails, end screens (they’re featured in our list of the best end screen makers), and of course, channel art.
How to create a YouTube banner using Snappa’s channel art maker
To create your channel banner on Snappa, you have two options:
- Option 1: Select a readymade template to modify
- Option 2: Create your own design from scratch
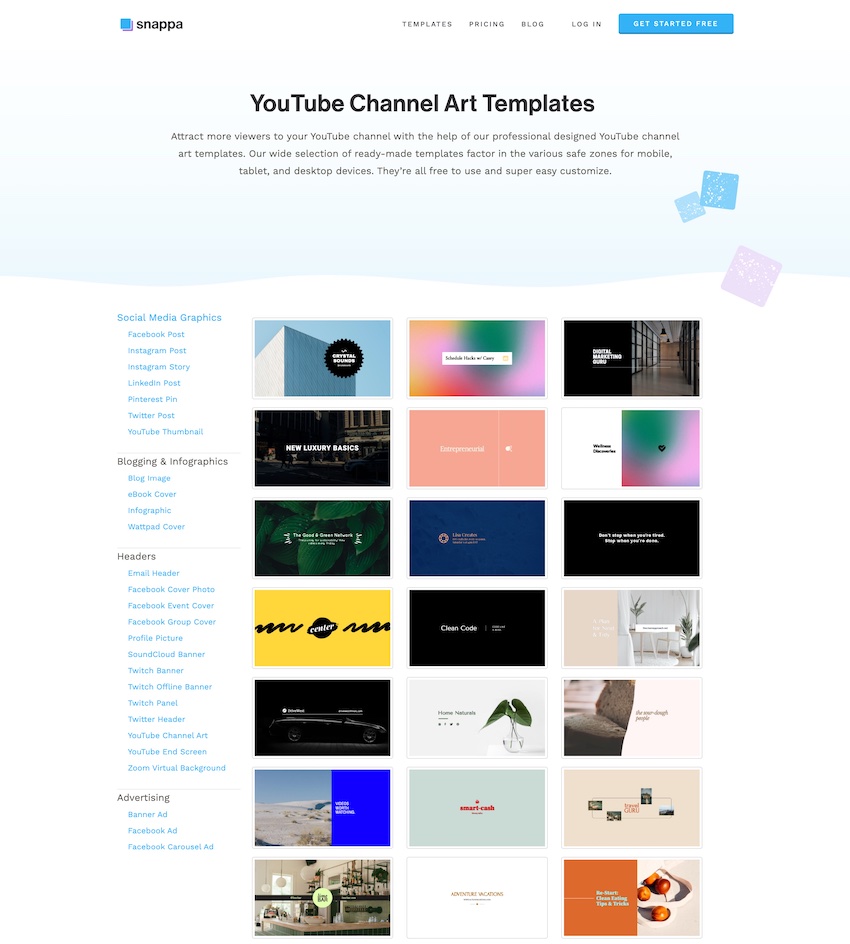
Snappa currently has around 120 YouTube banner templates which is a decent number but not quite as many as some of the other YouTube channel art makers such as Canva and Placeit that have a bigger library to choose from.
If you go with option 1 you simply need to login to your Snappa account, navigate to the YouTube channel art templates, and then select one that you like:

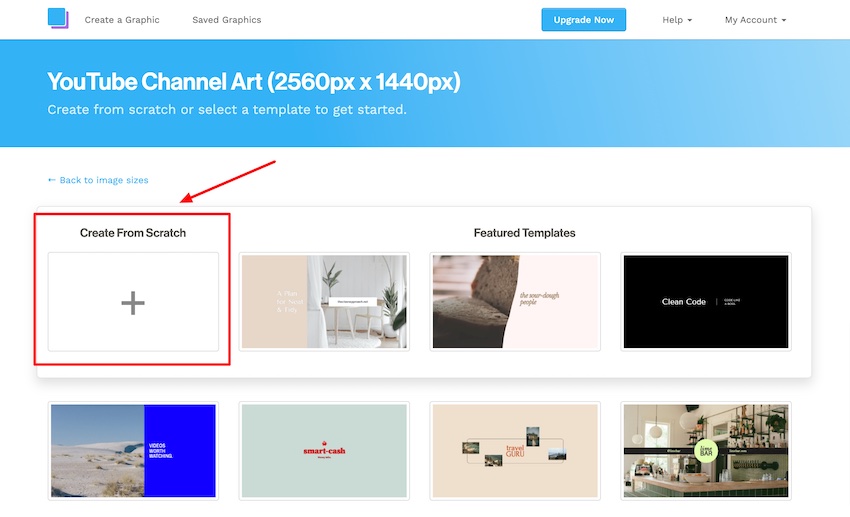
If you decide to start a design from a blank canvas (option 2) you simply need to click on the ‘Create From Scratch’ option, and this will open the editor with a completely blank canvas:
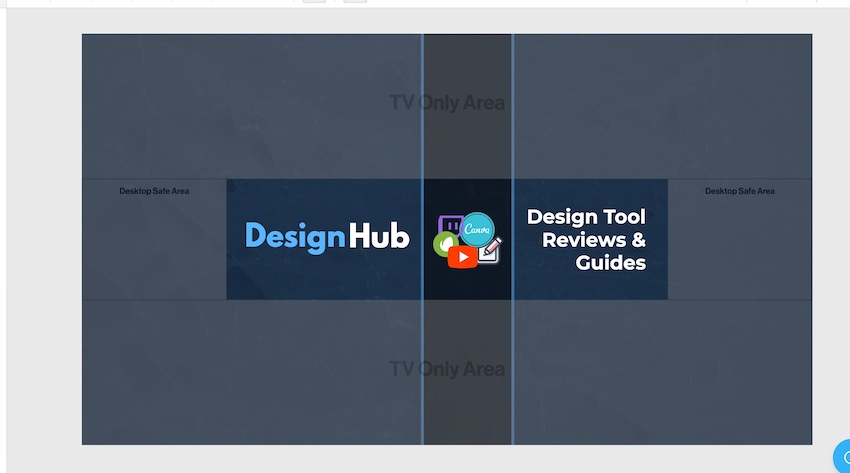
Whether you’ve selected a template or clicked on ‘create from scratch’ you’ll be taken to the editor, and one of the first things to notice is that Snappa has a handy sizing guide built into their tool to make sure your designs will be the right dimensions for YouTube and look good on all devices:

You can see in the image above that Snappa shows you what parts of the design will show on TVs only, the ‘Desktop safe’ areas, and the middle part of the design which will be shown on all devices including mobile displays.
It’s a super helpful feature to make sure your designs will look good on YouTube no matter what the platform but you can also check out Google’s size guide for more sizing details.
When it comes to creating or customizing your design, the options on Snappa are fairly straightforward.
The first thing you’ll want to do is to add or update the background. The options here are to add a photo (either by uploading your own or choosing from their library), pattern, or making the background a solid color:
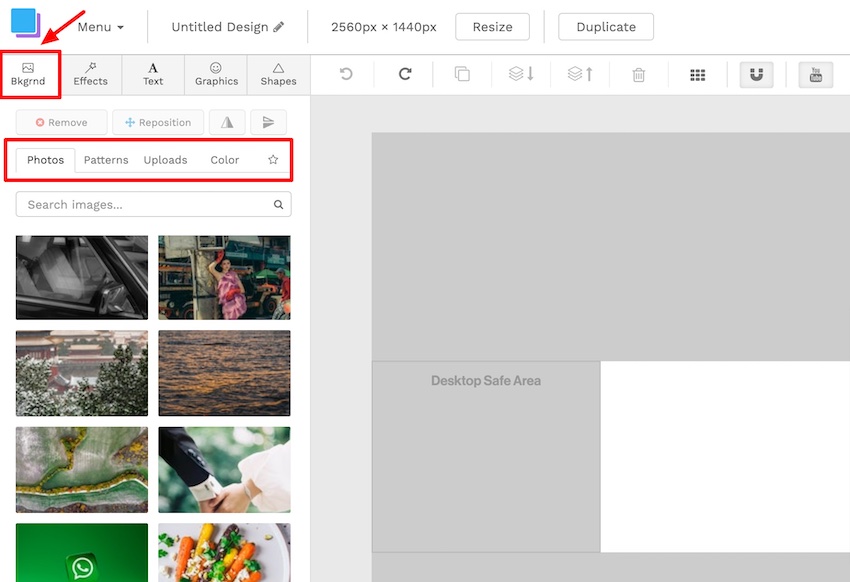
We recommend using a photo or a pattern to make your background a bit more interesting than simply having a solid color.
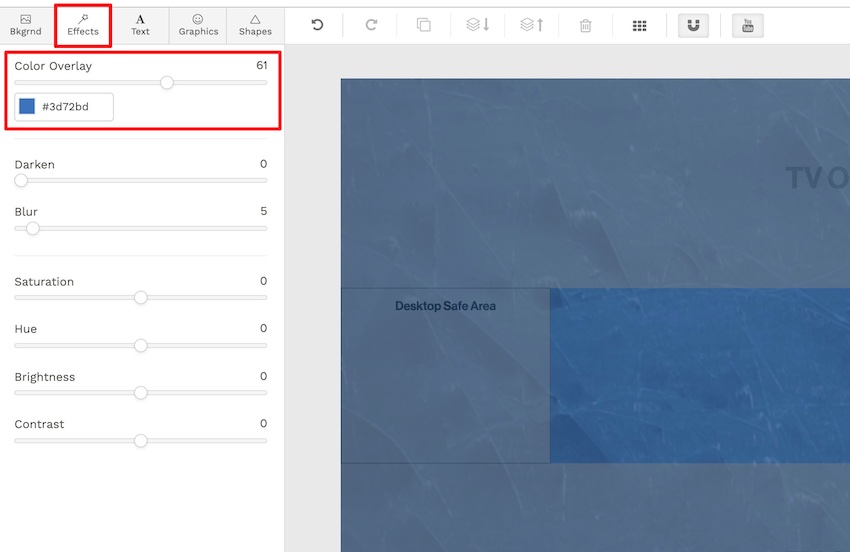
Once you’ve chosen the background, you can navigate to the ‘Effects’ tab to customize it further with a color overlay, and with the other effect option available until you are happy with how that part looks:
The next step would be to add some text. You can do that by navigating to the text tab and selecting the ‘Add a heading option which will add a header text field to the canvas:
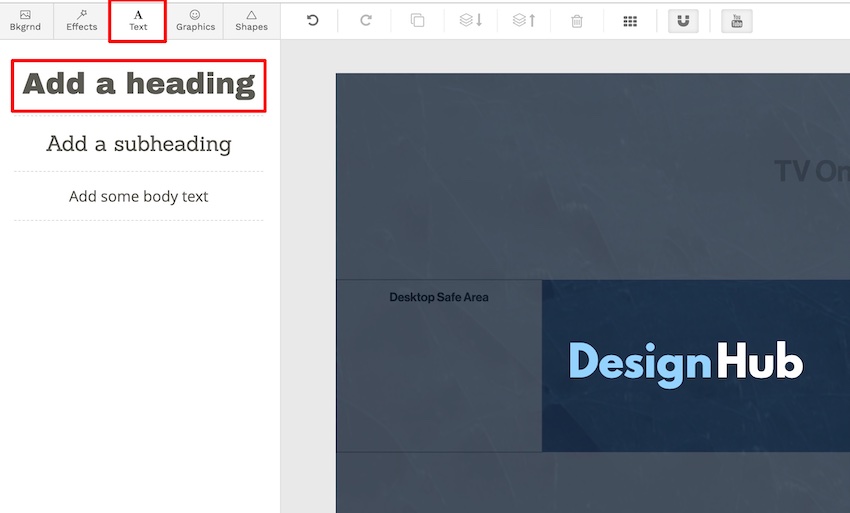
You can select the text field to modify it, and you’ll see all the additional text customization options on the left side of the editor. We’d also recommend leaving the ‘Safe zone’ on so you can see how all the elements of your design line up:
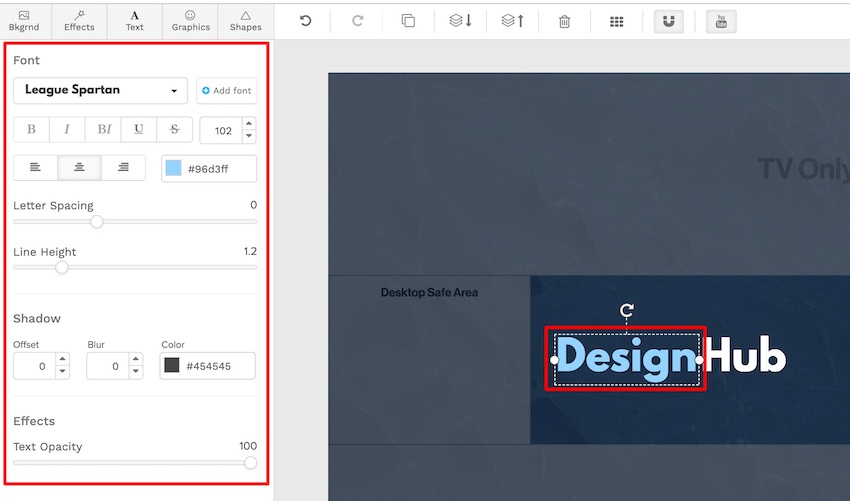
You’ll also likely want to add a bit of text that describes to your audience what your channel is all about, and you can move these text elements around the canvas until you’re happy with their positions, sizes, etc.
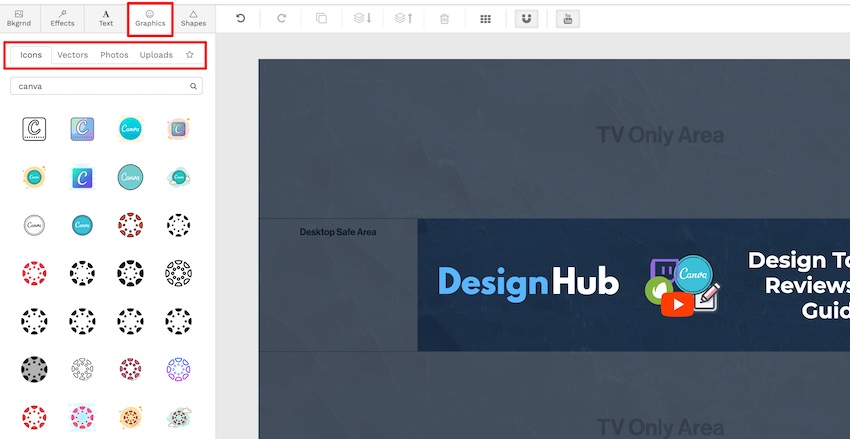
You can also add or upload graphics to your design. These could be emojis, icons, logos, etc., Snappa has a good-sized library of design elements that you can utilize:
At this point, your design should be coming together nicely, but if you look at the design in full you might think that it looks a bit bare, particularly on larger device screens:
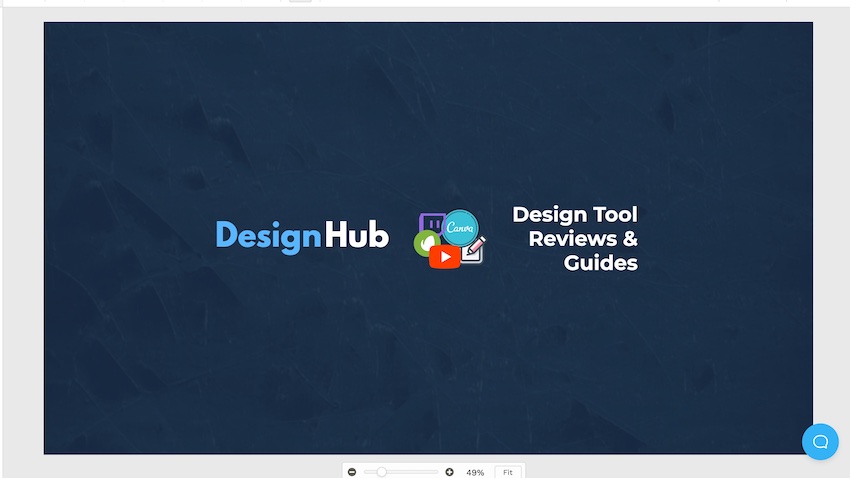
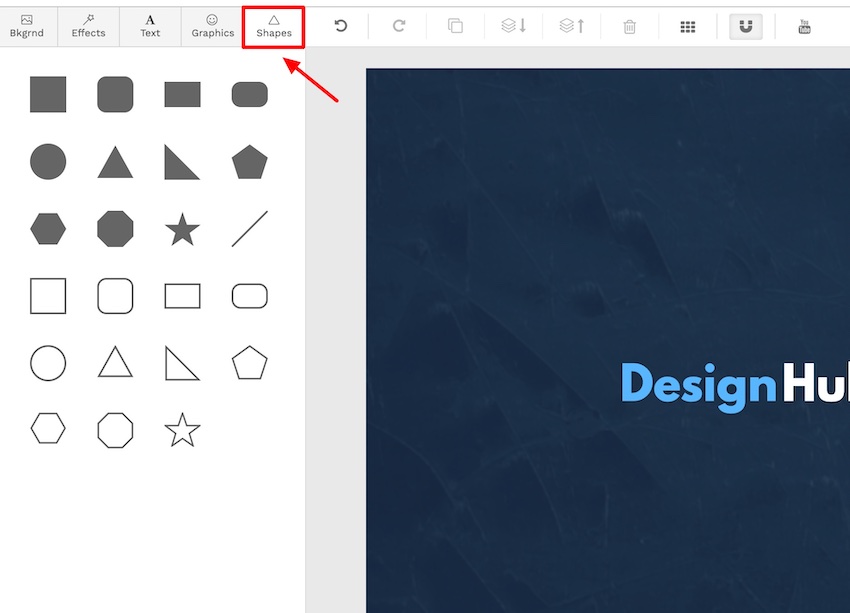
To make this look a bit better you can break up the design slightly by adding shapes, and this can really help it look good no matter what device or platform a visitor is using.
Simply navigate to the ‘shapes’ tab, add some shapes you think could work well, and modify them to complete your design.
We use a square shape to split the design in half, which we feel makes it look a bit better across all devices:
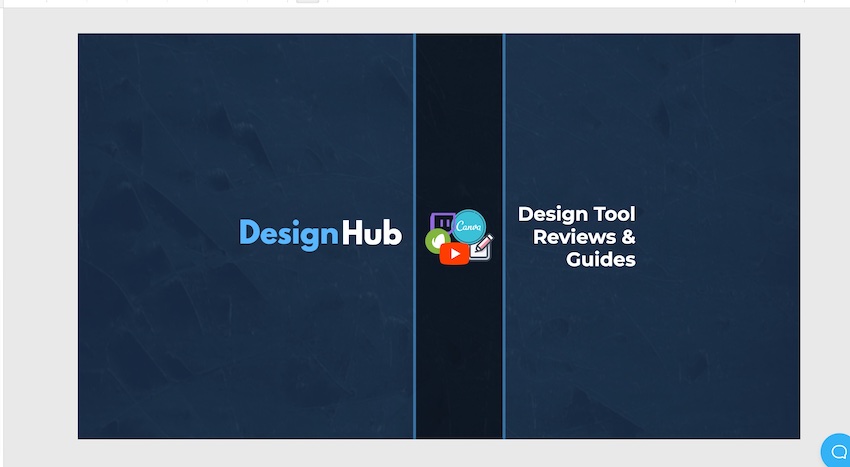
Once you’ve got your YouTube channel art looking good, you can hit the download button on the top right side of the screen:
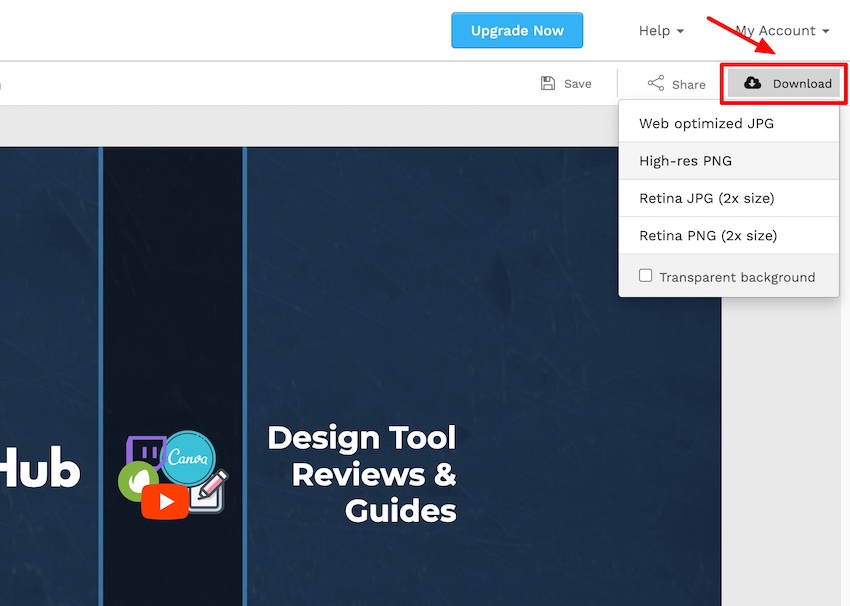
The free Snappa plan gives you 3 downloads per month so you can download your YouTube channel banner design for free. We would recommend downloading it as a PNG so it looks as crisp and clear as possible on your channel.
And that’s it, you’ve created your YouTube channel art on Snappa, and downloaded it. The next step is to upload it to your YouTube channel. Here’s a guide that walks you through that process.
Snappa Pricing
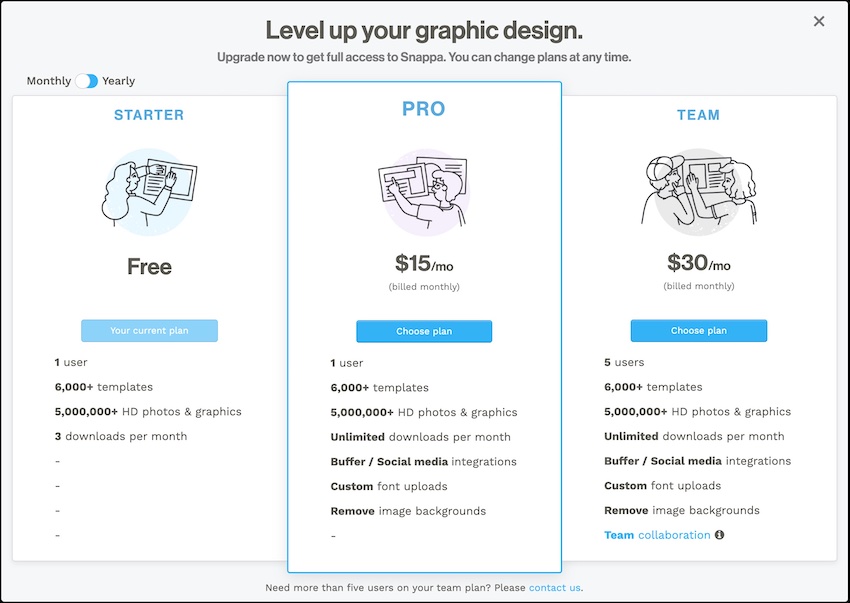
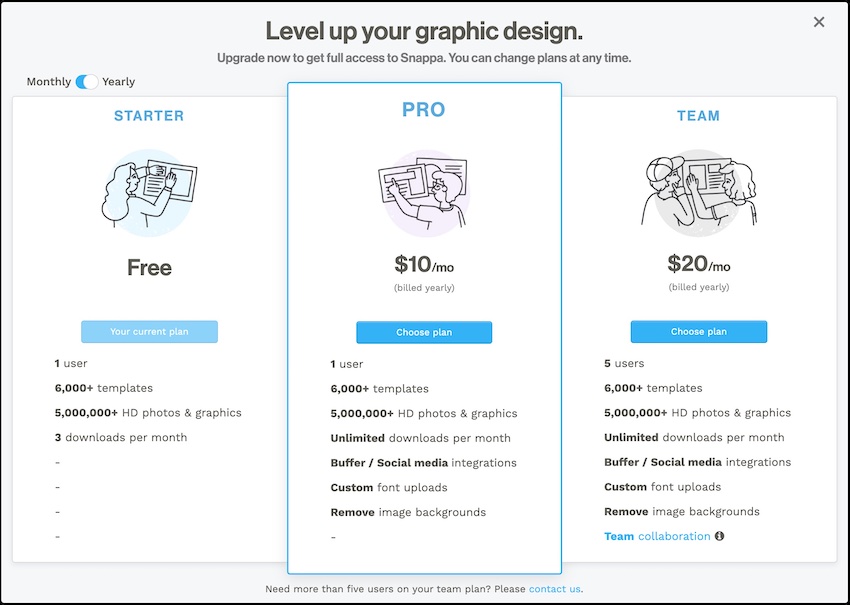
If you want to create your design for free you can do so on Snappa, but if you think you’ll be creating many more designs then it could be worth getting a premium Snappa account.
You can pay monthly or annually for a subscription, here are the price breakdowns for each option:
Monthly Pricing:
- Free Plan
- Pro Plan: $15 /month
- Team Plan: $30 /month
Yearly Pricing:
- Free Plan
- Pro Plan: $120 /year
- Team Plan: $240 /year
Alternative tools
If you’re looking for a different online design tool to create your YouTube channel art, we recommend checking out our YouTube channel banner makers article.
As mentioned previously, we think the range of template and design element options on Canva and Placeit makes them great options when creating design assets for your YouTube channel.
Wrapping things up
So, there you have it, that’s how you can easily and quickly create a fantastic-looking YouTube channel banner using Snappa.
Snappa is a great tool and makes the whole process of creating YouTube channel art a breeze, plus you can do it all completely for free.
Enjoy creating! Oh, and if you have any questions, comments, or suggestions for creating awesome YouTube thumbnails, leave a comment below!


